
Do you have boxes of old VHS and camcorder tapes tucked away in the attic or a spare room, gathering dust while holding some of your most precious family memories? If so, you’re not alone. Here’s how to digitise VHS tapes at home without spending a fortune.
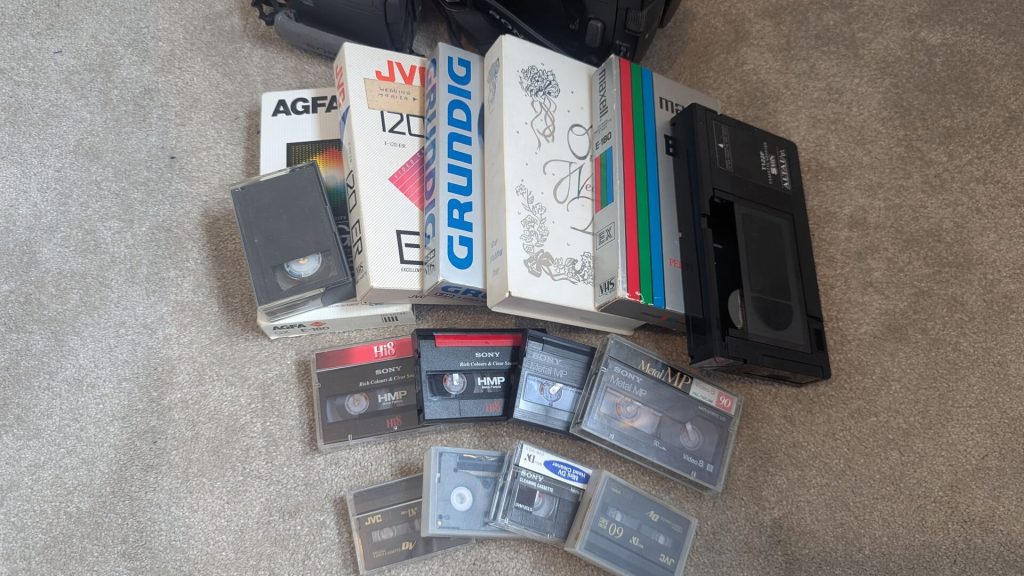
I’m Dan, and my spare room currently holds around 40 VHS tapes and around 20 camcorder tapes of different sizes.
It’s a treasure trove from the past, all thanks to my step-grandad, who we called Pops.
Before our daughter was born, I spent hours converting most of these old analogue tapes into digital files. We still have a backlog, but I’m slowly working through them.
Digitising old tapes is a massive, time-consuming job. Copying a four-hour tape takes four hours, and then editing, splitting and exporting the files takes even longer.
There really are no shortcuts!
But if you’ve got some spare time, a working VHS player and a laptop or PC, you can do the job yourself without paying a professional to convert every tape.
In this guide, I’ll show you the equipment I use, how I connected everything, the software I used and how I transferred our old family recordings onto a computer.
Quick answer: How do you digitise VHS tapes at home?
To digitise VHS tapes at home, you’ll need:
- A working VHS player (VCR).
- A SCART-to-RCA adapter if your player doesn’t have RCA outputs.
- Red, white and yellow RCA cables.
- An RCA-to-HDMI converter.
- An HDMI-to-USB video capture device, or a suitable USB analogue capture device.
- A laptop or desktop computer.
- Video capture software such as Movavi, Adobe Premier Pro or OBS Studio.
Connect your VHS player to the capture device, open your recording software, press play on the VHS player and start recording on your computer.
The video transfers in real time, so a two-hour VHS tape takes approximately two hours to digitise.
Once finished, you can save the video as a digital file, edit it if necessary and back it up to an external hard drive or cloud storage.
That’s the basic process. Here’s how I did it.
The legacy of Pops and his Sony camcorder
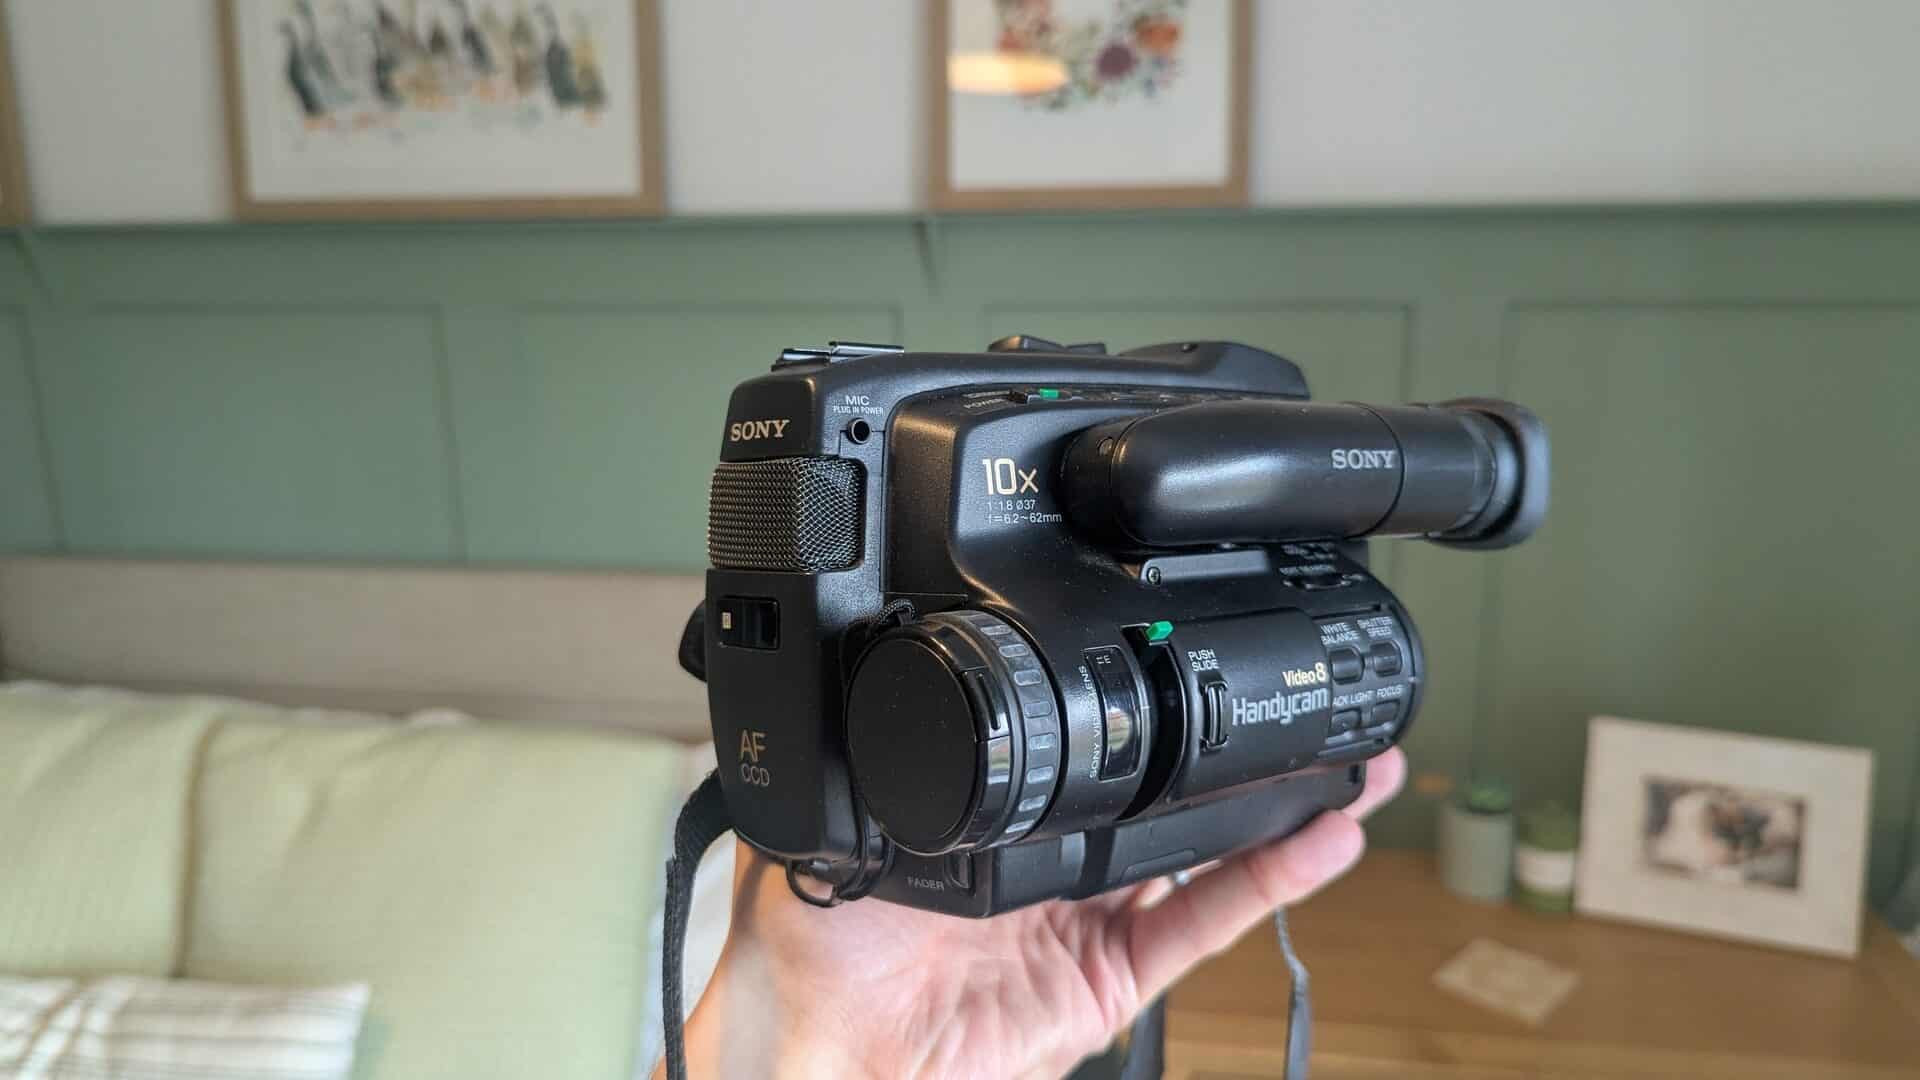
Pops was rarely without his trusty (and rather bulky) black Sony camcorder back in the 90s.
He was a former prison officer, a giant of a man, and always had that lens aimed at me and my sister.
Between 1992 and 2005, he wasn’t just recording videos; he was preserving our childhood.
He’d painstakingly link his camcorder to the TV, hit play on the camera and record directly onto a blank tape in the VHS player.
He’d often make three or four physical copies to share with relatives. Our Disneyworld trips stretched to four hours per tape, meaning he must have spent days copying them!
In 2019, we sadly lost Pops after a long battle with Alzheimer’s. As the “media guy” of the family, all those boxes of tapes came to me.
It became my mission to rescue those memories from ageing tapes and bring them into the digital age.
I didn’t want those recordings to eventually become unwatchable, or for the family to lose access to them simply because nobody owned a VHS player anymore.
Moving beyond “good enough” quality
My journey to digitising these tapes actually started about ten years ago when I first got given them.
I bought a cheap USB VHS-to-digital converter from eBay.
The results were awful.
The audio buzzed, the video came through OK, but the overall quality wasn’t good enough for what I wanted. I wanted to be able to watch these recordings on a modern television without feeling like I’d made a mess of preserving them.
It felt like a disservice to all of Pops’ hard work.
I knew I needed a better solution, something that would give me a decent digital copy without spending hundreds of pounds on professional equipment.
My plan was simple:
- Digitise the tapes: Convert the old analogue recordings into digital video files that could be watched on modern TVs, laptops and phones.
- Keep physical backups: Store the original digital files on an external hard drive.
- Create a cloud backup: Upload copies to OneDrive so the family could access and watch them without needing the original tapes.
I eventually settled on a fairly inexpensive setup using an old VHS player, a couple of adapters, a capture card and Movavi Video Editor.
It isn’t a professional restoration studio, but it’s worked well for my needs.
Equipment needed to digitise VHS tapes
You don’t need a professional £1,000 restoration studio to get started.
Here is the equipment I use to transfer my old VHS tapes at home.
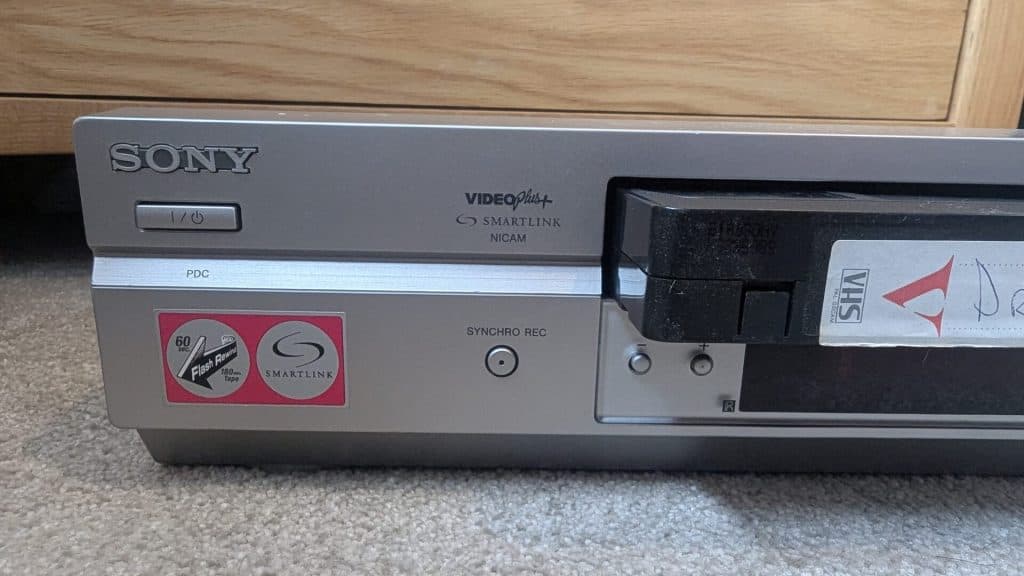
1. A working VHS player (VCR)
This is the most important part of the setup.
Without a working VHS player, you have no way of playing the tapes in the first place.
I picked mine up from Facebook Marketplace for just £10!
You don’t need anything particularly fancy, but you do need a player with working video and audio outputs.
Before putting any important family recordings into an old VHS player, test it with a blank tape or something you don’t mind losing.
The last thing you want is an old machine chewing up an irreplaceable family recording.
My tip: Check that the tape plays, rewinds and fast-forwards properly before starting your project.
2. A camcorder with the correct outputs
If you’re only converting full-size VHS tapes, you won’t necessarily need a camcorder.
However, if you’ve also got smaller camcorder tapes, you’ll need the correct playback equipment for those formats.
I had a mixture of VHS, Hi8 and other camcorder recordings to work through.
I’ve borrowed some older camcorders from friends. Ask around before spending money buying one, as plenty of people still have old cameras tucked away somewhere.
Remember that different camcorder formats need different playback equipment:
- VHS-C: A compatible VHS-C camcorder or a suitable VHS-C cassette adapter and VHS player.
- Video8 and Hi8: A compatible Video8 or Hi8 camcorder or deck.
- MiniDV: A compatible MiniDV camcorder or deck.
They might look similar, but the tapes aren’t interchangeable.
3. A laptop or desktop computer
You’ll need a computer to capture and save the video files.
It doesn’t have to be a particularly expensive machine, but you’ll want enough available storage space to handle the recordings.
Remember, you’re recording video in real time, so your computer needs to stay switched on throughout the process.
Make sure you’ve disabled sleep or standby settings while recording if you’re going to walk away from it and let it run.
4. Video editing and capture software
I use Movavi Video Editor, an older version 15.
It works well for my setup and allows me to capture the analogue video, edit the recordings and save the finished files.
One thing I liked about Movavi was that I could buy a version outright rather than commit to an ongoing Adobe subscription. My older version cost around £90 when I bought it.
You don’t have to use Movavi, though.
Another option is OBS Studio, which is free and can record video from compatible capture devices.
OBS is particularly useful if you’re comfortable spending a little time configuring your video and audio inputs.
Whichever software you choose, make sure it recognises your capture device before starting a lengthy recording.
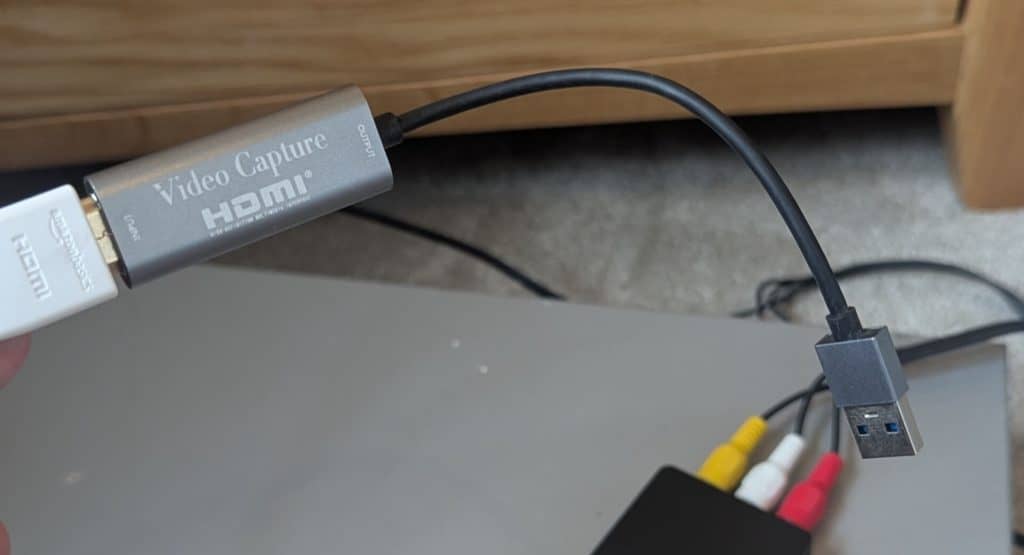
5. An HDMI-to-USB video capture card
This is the little device that allows your computer to receive the video signal.
I bought a cheap HDMI-to-USB capture card for around £8–£12.99 from Amazon.
It connects to your computer via USB and accepts an HDMI input from the converter.
Essentially, it allows your computer to recognise the incoming video as a capture source.
There are also USB capture devices that accept analogue RCA or S-Video directly. These can simplify the setup by removing the need for a separate HDMI converter.
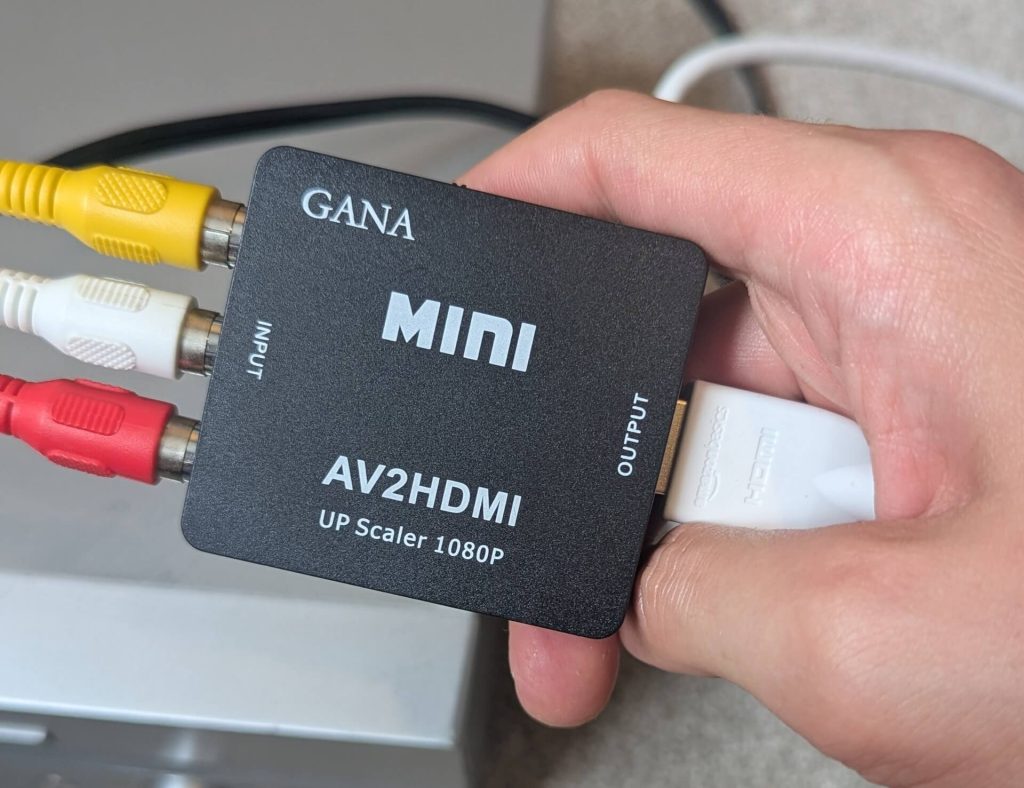
6. An RCA-to-HDMI converter / upscaler
This is another important part of my particular setup.
Your old VHS player outputs an analogue signal through the red, white and yellow cables. The RCA-to-HDMI converter takes that signal and converts it into HDMI.
I bought a GANA AV2HDMI converter from Amazon for around £8.99.
The converter I use can output an upscaled HDMI signal, which is then passed into the USB capture card.
Just remember that upscaling doesn’t turn old VHS footage into genuine HD. It changes the output resolution, rather than restoring detail that wasn’t present in the original recording.
For my budget setup, it was a convenient way of getting the picture into my computer.
7. RCA cables (red, white and yellow)
These are the standard cables that connect the VHS player to the converter.
- Yellow: Video.
- White: Left audio.
- Red: Right audio.
I already had a set of these in Pops’ old camera case, which saved me buying another set.
8. An HDMI cable
You’ll need an HDMI cable to connect the RCA-to-HDMI converter to the USB capture card.
Nothing particularly special is required for a standard VHS transfer.
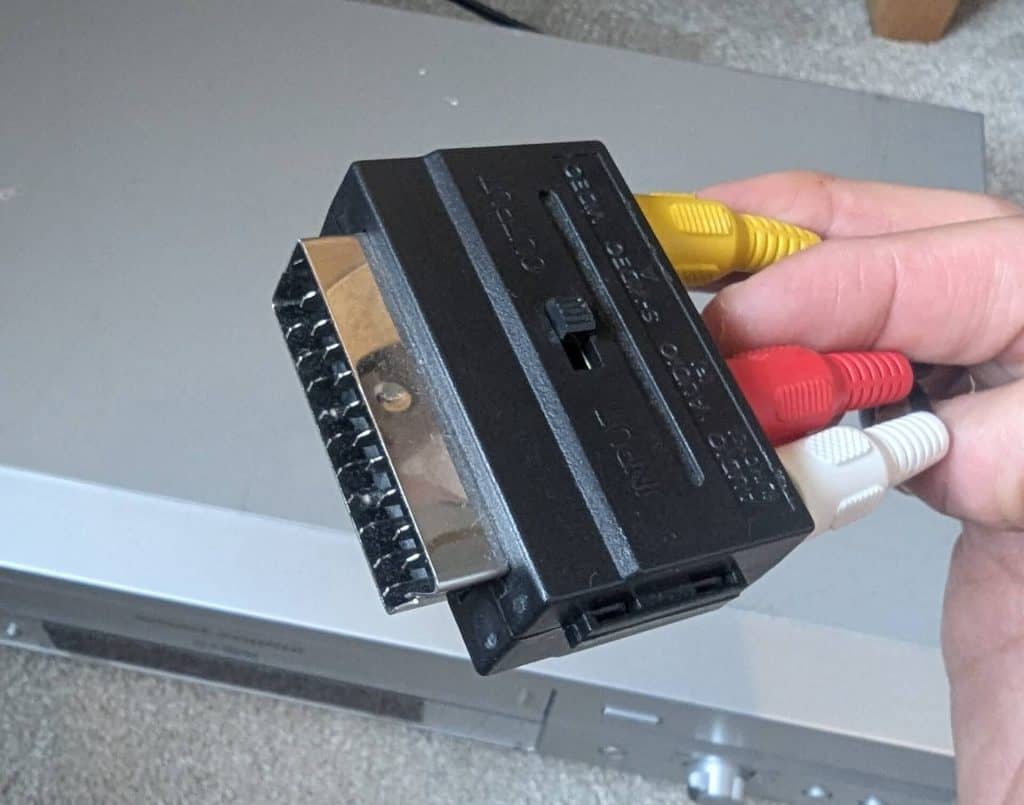
9. A SCART-to-RCA adapter
The VHS player I found only had SCART outputs, so I needed an adapter to connect the red, white and yellow cables.
These are inexpensive and easy to find online.
Make sure you have the correct input/output direction selected on the adapter. A SCART adapter with an input/output switch needs to be set to output from the VHS player.
Step-by-step setup: Connecting everything together
Once you’ve got all the equipment, it’s time to connect everything.
This is the exact hardware chain I use:
- VHS VCR player.
- SCART-to-RCA adapter fitted into the back of the VHS player.
- RCA AV cable (yellow, white and red plugs).
- RCA-to-HDMI converter.
- HDMI cable.
- HDMI-to-USB video capture card.
- Laptop or desktop computer.
The signal travels from the VHS player, through the adapters and into your computer.
Before opening your recording software, check that everything is connected properly and that the converter is powered if your model requires external power.
How to digitise VHS tapes using Movavi
Once everything is physically connected, it’s time to start recording.
These are the basic steps using my version of Movavi Video Editor.
- Open Movavi Video Editor on your computer.
- Select the video capture option.
- Choose your USB capture card as the video input source.
- Check that the video preview is showing the VHS picture.
- Check that the audio is coming through correctly.
- Rewind the VHS tape to the beginning.
- Press play on the VHS player.
- Start recording in Movavi.
Once recording starts, the computer will capture the video as the VHS player plays it.
It’s worth doing a short test first. Record a minute or two, stop, and play the resulting file back.
Check that the picture and audio are both working before committing to a four-hour recording.
A note about video settings: Most UK domestic VHS recordings use the PAL video standard. If your capture software lets you choose the video format, make sure it matches the source with frames per second. A typical PAL capture uses 25 frames per second. The correct settings will depend on your capture device and software.
Can you digitise VHS tapes in HD?
Old VHS recordings weren’t originally recorded in HD. Most UK VHS footage is standard-definition PAL video.
However, you can use an HDMI converter like I have or use software to upscale the output to a higher resolution.
This can make the video compatible with modern equipment and easier to watch on a modern television, but it doesn’t mean the original footage has gained genuine HD detail.
First, experiment, find the right setting that show the correct tone and sharpness. Once you have the right settings, then up the quality.
Why I like having an HDMI converter in my setup
There is another little trick I found useful when working through all my tapes.
By connecting the RCA-to-HDMI converter directly to my television, I could watch the old tapes without having to record them onto my computer first.
If we just wanted to sit on the couch and watch some of Pops’ old recordings, I could unplug the HDMI cable from the USB capture card and plug it straight into our 4K TV or monitor.
I actually did this first to work out what was on the tapes.
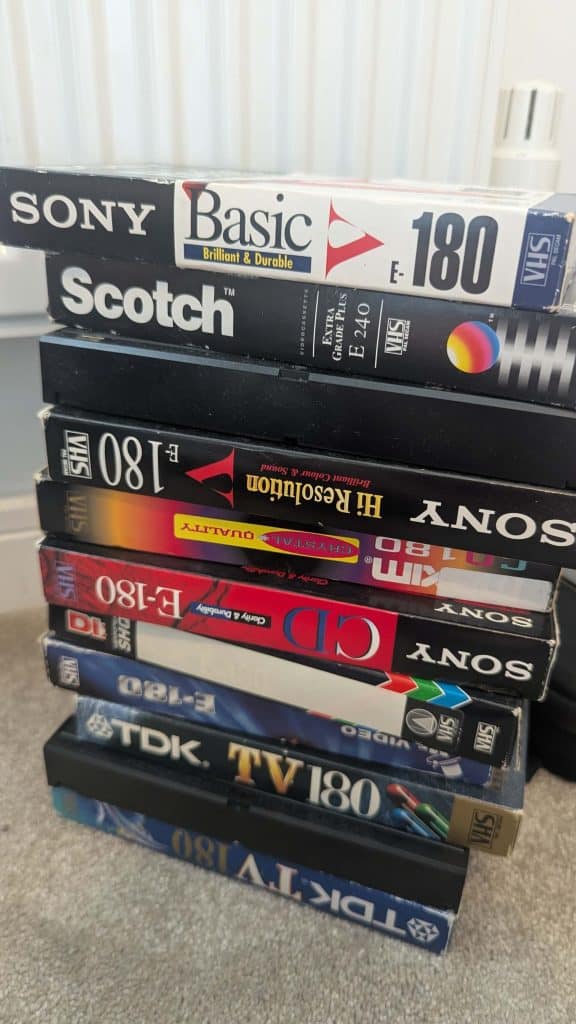
I had around 40 tapes to work through, and some were labelled things like “France 2002 plus a bit of Florida tape 4”.
It was much easier to preview them and work out what was worth digitising before spending hours recording each one.
The reality check: Digitising VHS tapes takes time!
This is probably the biggest thing I wish I’d appreciated before starting.
Because VHS is an analogue format, the recording process happens in real time.
A four-hour tape takes four hours to transfer.
And that’s before you’ve edited anything.
When my wife was pregnant, this became one of my go-to after-work tasks.
I’d get in, set a tape rolling, make sure my computer’s sleep and standby settings were switched off, and then get on with the household chores.
I’d walk the dog, cook dinner and iron clothes while Movavi did the work in the background!
Now that our daughter is here, finding a window to even get a recording started can be tough.
So take advantage of any downtime you have.
If you’ve got 20 tapes to convert and each one is two hours long, you’re looking at around 40 hours of recording time alone.
That’s a lot of evenings!
What to do with your VHS files once you’ve digitised them
Once you’ve finished recording, don’t just leave everything sitting in one folder on your computer.
The whole point of this exercise is to preserve your family memories for the future.
I use a combination of physical storage and OneDrive.
Here are a few things I’d recommend:
1. Give your files sensible names
Don’t leave everything labelled as Video001, Video002 and so on.
Try to identify the contents of each recording.
For example:
- Disneyworld Florida 1998
- Family Christmas 1996
- Birthday Party 2001
- Holiday in France 2002
You might not remember everything now, but you’ll be grateful for the descriptions in a few years.
2. Keep a copy on an external hard drive
An external hard drive is a relatively inexpensive way to store lots of video files.
It also means you’re not relying on your computer’s internal storage.
3. Upload another copy to cloud storage
I use OneDrive to make the videos accessible to the rest of the family.
You could also use another cloud storage provider.
The important thing is not to rely on just one copy.
4. Keep the original tapes
Even after digitising them, don’t immediately throw away the original tapes.
Check the complete digital recording first, make sure the sound and picture are working and create backups before deciding what to do with the physical originals.
For irreplaceable family footage, I’d keep the originals somewhere cool, dry and away from direct sunlight.
You never know, something better might come out in the next few months that might do all this even better.
Is it worth digitising VHS tapes yourself?
For me, absolutely.
I’ve spent a fair amount of time working through Pops’ old recordings, and it has been worth every minute.
There are cheaper and easier ways to get your tapes converted if you don’t want to do it yourself.
You can send them to a professional transfer service, and that might be the better option if you’ve only got a handful of tapes or don’t want to buy the equipment.
However, if you’ve got dozens of tapes, a working VHS player and a bit of patience, doing it yourself can be a very rewarding project.
You also get complete control over the recordings, how they’re edited and where they’re stored.
Most importantly, you’re preserving memories that might otherwise be forgotten.
I’m still working through my own backlog, and I know there are plenty more family memories waiting to be rediscovered.
Frequently asked questions about digitising VHS tapes
What is the cheapest way to digitise VHS tapes at home?
The cheapest approach is to use a working second-hand VHS player, a compatible USB video capture device, the correct cables and free recording software.
If you already own a VHS player and computer, you may only need to buy the capture equipment and adapters.
Can I convert VHS tapes to MP4?
Yes. Once you’ve captured the video on your computer, you can save or export it as an MP4 file using compatible capture or editing software.
MP4 is a convenient format because it’s widely supported by modern TVs, computers, tablets and smartphones.
How long does it take to digitise a VHS tape?
Digitising happens in real time. A two-hour VHS recording takes approximately two hours to capture, while a four-hour recording takes approximately four hours.
Editing and exporting the finished video will add extra time.
Can I digitise VHS tapes without a VHS player?
Not directly. You need compatible playback equipment to play the original tape.
If you don’t own a VHS player, you could buy one second-hand, borrow one or use a professional VHS-to-digital transfer service.
Can I digitise camcorder tapes using the same equipment?
Sometimes, yes. The capture equipment may be reusable, but you need a compatible camcorder or deck to play each tape format.
VHS-C, Video8, Hi8 and MiniDV all require the appropriate playback equipment.
Is it better to digitise VHS tapes yourself or use a professional service?
It depends on how many tapes you have, their condition and how much time you’re willing to spend.
Doing it yourself can save money if you have a large collection and the necessary equipment.
A professional service may be more convenient if you only have a few tapes, don’t own a working player or have damaged and particularly valuable recordings.
Does converting VHS to 1080p make the video HD?
No. But close. Upscaling can increase the output resolution, but it cannot recreate genuine detail that wasn’t recorded on the original tape.
The most important thing is to capture the original footage cleanly and preserve it properly.
Final thoughts
What started as a project to clear some old VHS tapes out of the spare room has turned into something much more meaningful.
Those recordings are a little piece of our family history.
Being able to sit down and watch footage of family holidays, birthdays and moments from my childhood is something I don’t take for granted.
I know digitising 40 VHS tapes and 20 camcorder tapes sounds like a lot of work, and it is!
But if you’ve got old recordings sitting in a cupboard somewhere, I’d genuinely recommend getting started sooner rather than later.
You don’t need to spend a fortune, and you don’t need to be a technology expert.
You just need the right equipment, a bit of patience and somewhere safe to store all those memories.
And if you’re anything like me, you’ll probably find yourself watching a few of those old recordings rather than getting on with the actual digitising!
Have you started converting your old VHS or camcorder tapes? I’d love to hear how you’ve got on.